Installation
ShowShark is easy to install even if you’re not a networking expert. Here’s how to get started:
Install Wireshark
Download and install the latest version of Wireshark for your operating system (macOS, Windows, or Linux).
Follow the instructions on the Wireshark website to complete the installation; you may need to install additional components such as WinPcap or Npcap on Windows. Some of this may sound scary but as long as you download Wireshark from the official site, you’ll be fine.
Download the ShowShark Plugin
Download the latest version of the ShowShark plugin from the ShowShark Download page.
In the download, you’ll find a Lua plugin file (for example, ShowShark_v1_0.lua).
Open Wireshark
On first run, Wireshark may prompt you to allow access to network interfaces. Grant permission as needed to enable packet capturing.
The first Wireshark screen you see may look a bit intimidating, but don’t worry! You don’t need to understand everything right away. Just focus on getting ShowShark installed for now.
Adding the Plugin to Wireshark
The easiest way to find the correct plugin folder is from within Wireshark itself:
- Open Wireshark.
- Go to the menu: Wireshark > About Wireshark > Folders (on macOS) or Help > About Wireshark > Folders (on Windows/Linux).
- Look for the entry called Personal Lua Plugins. This is the folder where you should place the ShowShark plugin files.
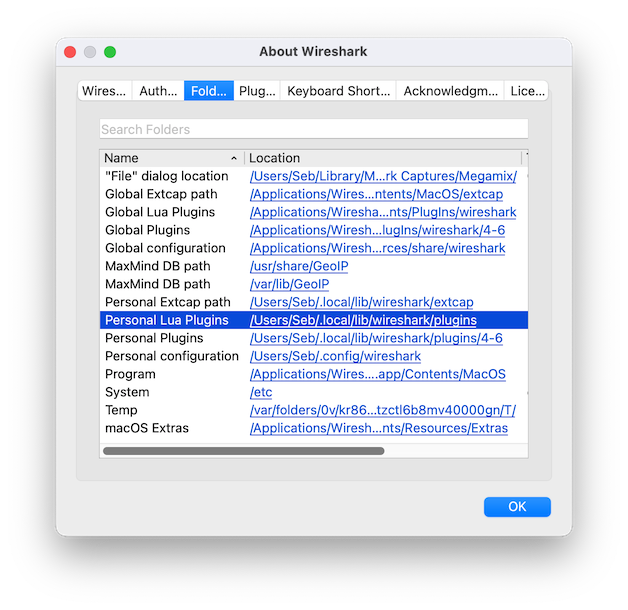
- Double click the folder path to open it in your file explorer and allow it to create the folder if it doesn’t already exist.
- Copy the downloaded ShowShark Lua plugin file (e.g.,
ShowShark_v1_0.lua) into this folder.
Load and Enable the Plugin
- In Wireshark, go to Analyze > Reload Lua Plugins to load ShowShark into Wireshark (or restart Wireshark).
- You should be greeted with the ShowShark About dialogue, confirming that the plugin has loaded successfully.
- You can verify the plugin loaded by checking Tools > ShowShark and Tools > ShowShark Filter Builder are the menu.
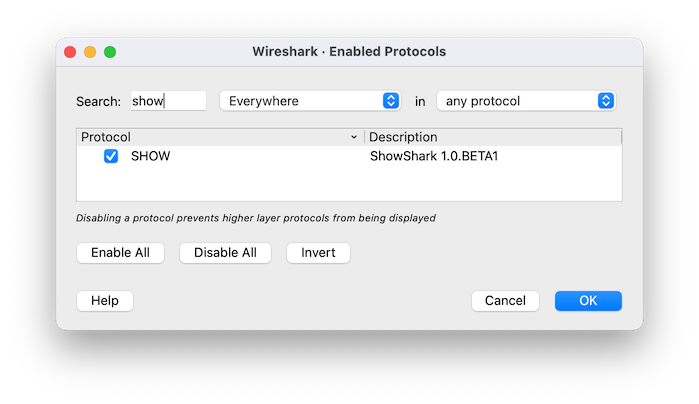
- Enable the plugin by going to Analyze > Enabled Protocols…, searching for “SHOW”, and tick the checkbox.
Whilst you’re here, it’s also useful to enable:
- ACN including ACN over UDP
- ARTNET including artnet-udp


- Click OK to apply the changes.
Next step: Configure Columns to customise your packet list display.